|
ArduinoLibs
|
|
ArduinoLibs
|
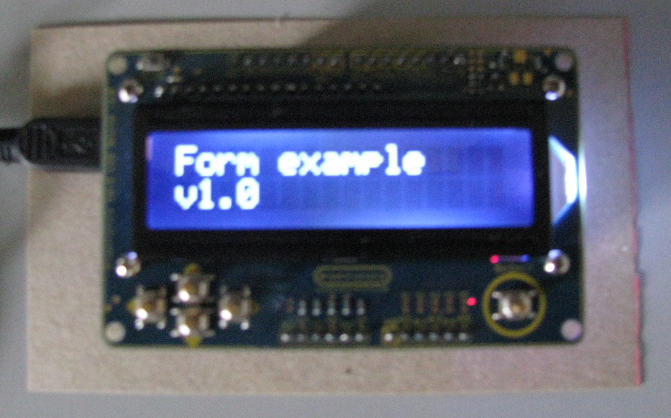
The Form and Field classes simplify the process of building user interfaces for Arduino projects that use a Freetronics LCD shield. That shield has a 16x2 LCD display and five buttons for Up, Down, Left, Right, and Select.
The user interface is organised as a "form" which consists of one or more "fields" that display or modify a single program parameter. The Left and Right buttons are used to navigate between fields, and the Up and Down buttons are used to modify the value of the currently-displayed field.
We start by including the classes from the library that we will need:
#include <LCD.h>
#include <Form.h>
#include <TextField.h>
#include <TimeField.h>
#include <IntField.h>
#include <BoolField.h>
Next, we initialize the LCD display, create the main form, and populate it with fields:
LCD lcd;
Form mainForm(lcd);
TextField welcomeField(mainForm, "Form example", "v1.0");
TimeField timeField(mainForm, "Time since reset", 24, TIMEFIELD_READ_ONLY);
IntField volumeField(mainForm, "Volume", 0, 100, 5, 85, "%");
BoolField ledField(mainForm, "Status LED", "On", "Off", true);
TimeField durationField(mainForm, "Timer duration", 24, TIMEFIELD_READ_WRITE);
Each field has a specific type, which may be one of the following classes:
Returning to our example, the above code creates the following fields:
welcomeField to display the program's name and version. timeField to display the number of seconds since reset, wrapping around after 24 hours. This field is read-only. volumeField which displays a volume between 0 and 100, with an Up/Down step of 5, and a suffix of "%". ledField which displays the current boolean state of the status LED on D13; the LED will change state when the user toggles the field's value. durationField which displays a read-write time field for selecting a duration between 0 and 24 hours.Now that we have defined our form, we need to initialize the program and show the form for the first time:
#define STATUS_LED 13

void setup() {
  // Status LED initially on.
  pinMode(STATUS_LED, OUTPUT);
  digitalWrite(STATUS_LED, HIGH);

  // Enable the screen saver, which will automatically blank the screen after 10 seconds.
  // The screen will wake up again when a button is pressed or lcd.display() is called.
  lcd.enableScreenSaver();

  // Show the main form for the first time.
  mainForm.show();
}
An application can have multiple forms, but only one can be shown at any given time. To switch to another form, call Form::hide() on the old form and Form::show() on the new form.
All that remains is to define our application's loop function which retrieves button events from LCD::getButton() and dispatches them to the form:
void loop() {
  // Update the number of seconds since reset:
  timeField.setValue(millis() / 1000);

  // Dispatch button events to the main form.
  int event = lcd.getButton();
  if (mainForm.dispatch(event) == FORM_CHANGED) {
    if (mainForm.isCurrent(ledField)) {
      if (ledField.value())
        digitalWrite(STATUS_LED, HIGH);
      else
        digitalWrite(STATUS_LED, LOW);
    }
  }
}
The full source code for the example follows:
/*
This example demonstrates how to use the Form and Field classes from the
LCD library to provide a simple UI on the 16x2 LCD display.

This example is placed into the public domain.
*/

// include the library code:
#include <LCD.h>
#include <Form.h>
#include <TextField.h>
#include <TimeField.h>
#include <IntField.h>
#include <BoolField.h>

// Initialize the LCD
LCD lcd;

// Note: if you are using the USBDroid and have reassigned pin D9 on the LCD shield to some
// other pin (e.g. A1), then you will need to initialize the shield with something like:
// LCD lcd(A1);
// See also: http://www.freetronics.com/pages/combining-the-lcd-keypad-shield-and-the-usbdroid

// Create the main form and its fields.
Form mainForm(lcd);
TextField welcomeField(mainForm, "Form example", "v1.0");
TimeField timeField(mainForm, "Time since reset", 24, TIMEFIELD_READ_ONLY);
IntField volumeField(mainForm, "Volume", 0, 100, 5, 85, "%");
BoolField ledField(mainForm, "Status LED", "On", "Off", true);
TimeField durationField(mainForm, "Timer duration", 24, TIMEFIELD_READ_WRITE);

#define STATUS_LED 13

void setup() {
  // Status LED initially on.
  pinMode(STATUS_LED, OUTPUT);
  digitalWrite(STATUS_LED, HIGH);

  // Enable the screen saver, which will automatically blank the screen after 10 seconds.
  // The screen will wake up again when a button is pressed or lcd.display() is called.
  lcd.enableScreenSaver();

  // Show the main form for the first time.
  mainForm.show();
}

void loop() {
  // Update the number of seconds since reset:
  timeField.setValue(millis() / 1000);

  // Dispatch button events to the main form.
  int event = lcd.getButton();
  if (mainForm.dispatch(event) == FORM_CHANGED) {
    if (mainForm.isCurrent(ledField)) {
      if (ledField.value())
        digitalWrite(STATUS_LED, HIGH);
      else
        digitalWrite(STATUS_LED, LOW);
    }
  }
}
 1.7.4
1.7.4

